Spring Cloud Config
Cloud Config란 서비스의 환경설정을Config Server-Client를 통해 관리할 수 있도록 제공한다.- DB가 분리되고 대량의 컨테이너 배포 환경으로 구성되는 마이크로 서비스에서는 환경설정을
Config Server를 이용해 중앙 집중적으로 관리할 수 있다. Git Repository기반으로 관리되는Config Server의 설정 값이 변경되면Config Server를 바라보고 있는Config Client들에게 변경사항을 전파하여 설정 값을 갱신할 수 있다.
간단히 말해, 서버의 빌드/배포 없이 운영중인 서비스의 환경설정을 변경할 수 있다.
전체 코드는 GitHub 에서 확인할 수 있습니다.
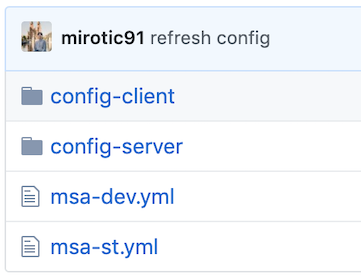
Git Repository 구성
환경설정 프로퍼티는 아래와 같은 규약을 따른다.
{label}: 옵션 값으로 Git branch 이름을 뜻한다.{application}: Config Client 애플리케이션의 이름을 뜻한다. spring.application.name{profile}: Config Client 의 active profile 을 뜻한다. spring.profiles.active
/{application}/{profile}[/{label}]
/{application}-{profile}.yml
/{label}/{application}-{profile}.yml
/{application}-{profile}.properties
/{label}/{application}-{profile}.properties
/{application}-{profile}.yml 규약에 따라 파일을 각각 만들어줬다.
# msa-dev.yml
application:
  message: "Message From <DEV> Git Repository"

# msa-st.yml
application:
  message: "Message From <ST> Git Repository"
Config Server 구현
Environment : Spring Boot 2.1.5, Gradle
Spring Initializer 로 프로젝트 생성시 web 과 config server 를 선택하거나 아래 의존성을 추가한다.
dependencies {
    implementation 'org.springframework.boot:spring-boot-starter-web'
    implementation 'org.springframework.cloud:spring-cloud-config-server'
}
@EnableConfigServer 어노테이션을 달아주면 관련 설정을 자동으로 해준다.
@SpringBootApplication
@EnableConfigServer
public class ConfigServerApplication {
    public static void main(String[] args) {
        SpringApplication.run(ConfigServerApplication.class, args);
    }
}
{Git Repo} 에는 자신의 Git Repository 경로를 설정한다.
# application.yml
server:
  port: 8888

spring:
  application:
    name: "config-server"
  cloud:
    config:
      server:
        git:
          uri: {Git Repo}
Config Client 구현
Environment : Spring Boot 2.1.5, Gradle
Spring Initializer 로 프로젝트 생성시 web 과 config client, actuator 를 선택하거나 아래 의존성을 추가한다.
dependencies {
    implementation 'org.springframework.boot:spring-boot-starter-web'
    implementation 'org.springframework.cloud:spring-cloud-config-client'
    implementation 'org.springframework.boot:spring-boot-starter-actuator'
}
@ConfigurationProperties 어노테이션에는 앞서 .yml 의 프로퍼티 값을 설정한다.
@Component
@ConfigurationProperties("application")
@Getter @Setter
public class ConfigProperties {

    private String message;
}
앞서 설정한 ConfigProperties 빈을 주입 받아 프로퍼티 설정값을 잘 가져오는지 확인할 수 있는 API를 생성한다.
@RestController
@RequiredArgsConstructor // lombok
public class ConfigController {

    private final ConfigProperties configProperties;

    @GetMapping("/config")
    public ResponseEntity config() {
        return ResponseEntity.ok(configProperties.getMessage());
    }
}
Config Client 애플리케이션 이름과 바라볼 Config Server 의 주소를 설정한다. 설정 파일명은 bootstrap 이어야 한다.
# 앞서 설정한 {application}과 일치하도록 설정
spring:
  profiles:
    active: dev
  application:
    name: msa

# Config Server 주소 설정
---
spring:
  profiles: dev
  cloud:
    config:
      uri: http://localhost:8888
---
spring:
  profiles: st
  cloud:
    config:
      uri: http://localhost:8888
Test
클라이언트를 실행시킨 후 아래와 같이 API를 호출할 수 있다.
active profile 에 따라 설정 값을 정상적으로 가져오는 것을 확인해보자.
active profile : dev
   GET http://127.0.0.1:8080/config

   HTTP/1.1 200
   Content-Type: text/plain;charset=UTF-8
   Content-Length: 39
   Date: Thu, 30 May 2019 23:46:41 GMT

   Message From <DEV> Git Repository

   Response code: 200; Time: 168ms; Content length: 39 bytes
active profile : st
   GET http://127.0.0.1:8080/config

   HTTP/1.1 200
   Content-Type: text/plain;charset=UTF-8
   Content-Length: 38
   Date: Thu, 30 May 2019 23:47:38 GMT

   Message From <ST> Git Repository

   Response code: 200; Time: 125ms; Content length: 38 bytes
active profile : real
msa-real.yml 이란 파일은 존재하지 않음
   GET http://127.0.0.1:8080/config

   HTTP/1.1 200
   Content-Length: 0
   Date: Thu, 30 May 2019 23:44:33 GMT

   <Response body is empty>

   Response code: 200; Time: 131ms; Content length: 0 bytes
Refresh
Config Client 가 Config Server 의 변경된 설정을 인지하기 위해서는 추가 설정이 필요하다.
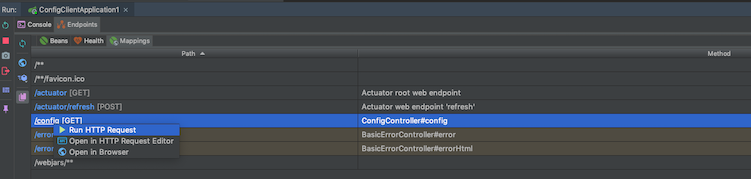
Config Server 로 부터 갱신된 설정을 받아올 수 있는 URI(/actuator/refresh)를 노출하도록 Config Client 의 bootstrap.yml 에 아래 설정을 추가해준다.
management:
  endpoints:
    web:
      exposure:
        include: "refresh"
@RefreshScope 어노테이션은 설정 값이 변경되었을 때 Config Server 의 변경된 값을 갱신하기 위해 추가한다.
@Component
@RefreshScope
@ConfigurationProperties("application")
@Getter @Setter
public class ConfigProperties {

    private String message;
}
Test
active profile : dev
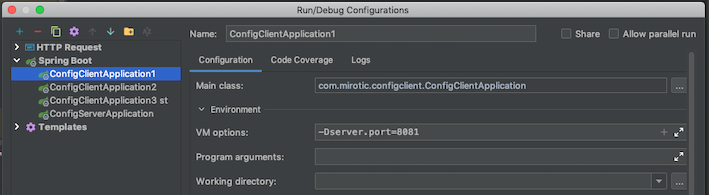
refresh 유무를 확인하기 위해 Config Client 2대를 각각 다른 포트로 실행한다.
아래와 같이 각 VM Options 에 8081 포트와 8082 포트로 설정했다.
먼저 8081 포트로 실행한 클라이언트에서 호출하면 프로퍼티 값을 잘 가져온다.
   GET http://127.0.0.1:8081/config

   HTTP/1.1 200
   Content-Type: text/plain;charset=UTF-8
   Content-Length: 39
   Date: Thu, 30 May 2019 23:46:41 GMT

   Message From <DEV> Git Repository

   Response code: 200; Time: 168ms; Content length: 39 bytes
Git Repository 에 있는 msa-dev.yml 의 프로퍼티 값을 변경해주고 refresh 요청을 한다.
   POST http://127.0.0.1:8081/actuator/refresh

   HTTP/1.1 200
   Content-Type: application/vnd.spring-boot.actuator.v2+json;charset=UTF-8
   Transfer-Encoding: chunked
   Date: Sun, 02 Jun 2019 23:39:04 GMT

   [
       "config.client.version",
       "application.message"
   ]

   Response code: 200; Time: 1146ms; Content length: 2 bytes
application.message 의 변경이 감지되었으니 변경된 값을 가져오는지 확인해보자.
   GET http://127.0.0.1:8081/config

   HTTP/1.1 200
   Content-Type: text/plain;charset=UTF-8
   Content-Length: 56
   Date: Sun, 02 Jun 2019 23:40:15 GMT

   Message From <DEV> Git Repository - refresh test -

   Response code: 200; Time: 21ms; Content length: 56 bytes
다음은 8082 포트로 실행한 클라이언트의 값을 확인해보자.
   GET http://127.0.0.1:8082/config

   HTTP/1.1 200
   Content-Type: text/plain;charset=UTF-8
   Content-Length: 39
   Date: Thu, 30 May 2019 23:46:41 GMT

   Message From <DEV> Git Repository

   Response code: 200; Time: 168ms; Content length: 39 bytes
8081 포트로 실행한 클라이언트에서만 refresh 를 호출하였으므로 8082 포트로 실행한 클라이언트에서는 여전히 갱신되지 않은 값을 가져온다.
Config Client 가 여럿으로 구성된 경우에는 각 클라이언트마다 refresh 호출해줘야 하는 번거로움이 있다.
Spring Cloud Bus 를 이용하여 구현하면 message broker 나 webhook 을 통해 변경을 전파하여 자동으로 갱신시킬 수 있다.